Snappy H’appy Photo Challenge-Week 10-Color Splash

snappyhappy-galactic

Welcome to Week 10 of the Snappy H’appy Photo Challenge.  Color Splash, or basically a way to bring out a singular color or splash of color in an otherwise black and white photo – is something I have always wanted to learn how to do.  After reading over all the great advice from hosts We Live in a Flat and Firebonnet, I jumped right into this challenge!

Selective color is a post-processing technique where most of a photo is converted to black and white, but some parts are left in color…  The selective color technique emphasizes parts of the photo and draws more attention to the subject.

After reading the post at We Live in a Flat, I checked out the app PicsArt, and found it very easy to use to apply this effect.  The effect can also be applied via Leonardo, but it uses masking and is a little more difficult to apply.  Here is a short video on color splash in the app Leonardo.

After looking at some other color splash examples, I decided to use a photo of my cat Tyler’s eyes.  but with alterations first, of course!

Original-Tyler-1

Original Photo of Tyler

After basic editing in Afterlight, I pulled three photos (Tyler’s eyes, and two quilt photos) into the app Split Pic Pro.  (Hint:  Photograph fabric, walls, floors, anything with texture to save and use in “combined” photos at a later date.)  This app allows you to quickly select several photos to place in a collage, and then blend together.  The blending level is easily done via a slide bar.  Here are the three photos I used in the app, with blending applied.

Snagit Tyler Photo 1

And another photo after application of filters to each photo, again easily accomplished directly within the screen you are working on.  Just highlight each separate photo, and a selection of filters will be at the bottom of the screen, as seen here:

Snagit Tyler Photo 2

I chose filters that would better highlight my main subject.  Those two quilt photos added some nice texture – abstract art – to my kitty’s face!  Once happy with these additional edits in the Split Pic Pro app, I saved the photo and then pulled it into PicsArt for the final color splash application.  I even tweaked the eye color to make the eyes more blue within the color splash screen.

Final-Tyler-Eyes.1

App Challenge Image
Abstract Cat

Mobile Device: iPhone 4s
Apps Used:  Afterlight, Split Pic Pro, PicsArt

I simply love these photos of my sweet kitty Tyler.  Part cat – part art!!  Meow.

Snappy H’appy Photo Challenge-Week 9-Double Exposures

snappyhappy-galactic

This week’s photo challenge will be a difficult one for me, I think.  Welcome back to Week 9 of the Snappy H’appy Photo Challenge hosted by We Live in a Flat and Firebonnet.  This challenge is discovering ways to create double exposures.  We Live in a Flat describes them this way:

If you have a film camera that allows you to expose the same frame twice to different subjects, you will end up with a photo that comprises the two scenes overlapping each other. Photos taken using this method are called double exposures. And in the case where there is more than two times the frame is exposed, the result becomes a multiple exposure.

I love the link to the video tutorial for good double exposures on We Live in a Flat’s site, especially the end of the tutorial that explains how to quickly create a double exposure in Photoshop.  However, since we are focusing on photo apps, I decided to try that same technique in my new app Leonardo, which also allows for double exposures.

It does seem that photos often look better with this technique in black and white; also I’ve noticed that photos where at least one photo is not too “busy” also work well.  So here goes…

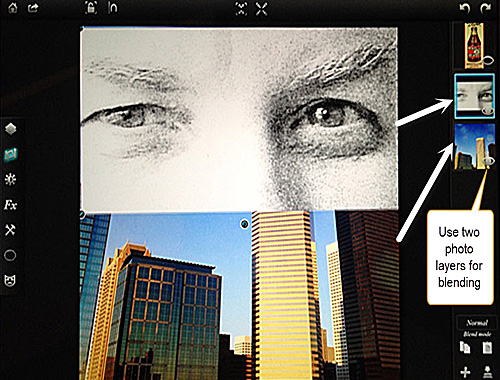
I chose to use a photo of the Houston skyline, already adjusted in Afterlight and Mextures.  Then I took a quick photo of my husband’s eyes, again edited in Afterlight and converted to black and white.  As a “half” photo, I also knew the blending would be easier, so cropped the eyes appropriately.   Then I pulled both photos into the Leonardo app.  Here they are:

Leonardo-Eye-12-Snagit

Leonardo-Choose 2 photos to blend

Then, using the “blend” mode offered in the lower right-hand side of the screen, I selected the “burn” mode from the choices given.  This one seemed to blend the two photos best.  Once that was selected I fine-tuned the opacity on the eye photo so that the eyes blended better with the sky.

Leonardo-Eye-11-Snagit

 Leonardo-Adjusting the Opacity Levels

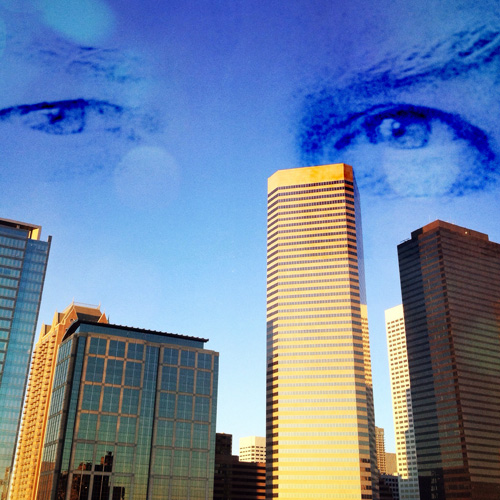
Having the original of the eyes in black and white caused them to be blue like the sky, achieving just the effect I was after!  Success!!  Here is the final photo.

Final-Eye-in-Sky

App Challenge Image
Eyes in the Sky

Mobile Device: iPhone 4s
App Used:  Afterlight, Mextures, Leonardo

Snappy H’appy Photo Challenge-Week 8-Mirroring

snappyhappy-galactic

Welcome to Week 8 of the Snappy H’appy Photo Challenge.  Working on filling up my grid with host We Live in a Flat (and co-host FireBonnet).  Host We Live in a Flat states:

“Mirrored photos can be gimmicky. But that is not to say there is no place for them in mobile phoneography. The mirror, after all, is a well-used metaphor in so many occasions and samples of literature.”

This is not something I have ever tried with my mobile photography – or for that matter tried at all, although I have seen some wonderful examples used at We Live in a Flat on a regular basis.  Be sure to check them out!

Leonardo App

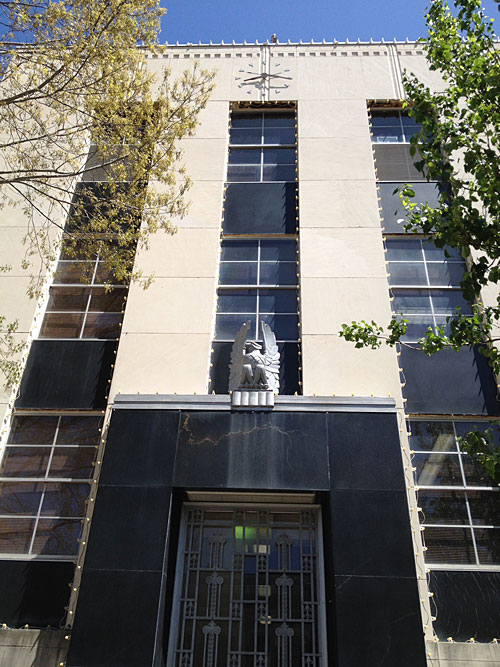
I decided to try using the app Leonardo  for this effect.  It was mentioned on Instagram, and I did more research than usual on this app, as the purchase price was $4.99, higher than most iPhone/iPad apps.  Research and reviews gave me a “thumbs up” decision to purchase, and I am so happy I did.  This is a fantastic app, much like a mobile version of Photoshop.  You can create layers and mask effectively.  This is a total editing app!  One thing I really like, and had not been able to find thus far, is the ability to adjust perspective.  This is especially useful with architecture.  The app also has many filters and effects, including the mirror effect of this photo challenge. I chose a recently taken architectural photo that I thought would lend itself well to this effect.

Original-Mirror-1

My Original Photo
Washington County Courthouse, Texas

And the completed mirror effect, with all edits done directly in the Leonardo app.  Edits included basic editing (lighting, contrast, cropping, sharpness, etc.), and additional edits of mirror effect, light leaks, and poster filter.  Hope you enjoy the final results!

Final-Mirror-1

App Challenge Image
Guardian Lions

Mobile Device: iPhone 4s
App Used:  Leonardo